Eye Makeup Tutorial – Glitter, Gold and Greens
Hello Everyone,
How are you doing? I have started feeling better.. Thanks to your wonderful and motivating comments <3. I have quite a lot of Makeup tutorials and look ready with me but the effort it goes into selecting the images, making a collage and preparing the post keep me on the back foot and I prefer to post them as a last resort :).. I havent been clicking pictures for many weekend and nor did wrote any review.. so here goes this Eye Makeup tutorial for all of you.
It is not a simple or easy peasy tutorial.. so brace yourself for this length Eye Makeup Tut. I bought quite a bunch of MAC pigments out of excitement but was super-lazy to put them to use, I am not joking 😛 . Those tiny little tubs were lying in a corner for almost an year untouched, unused.. but the wait is over now and here is the first look using MAC loose Eye shadow Pigments.
- Don’t Miss to Checkout: Sonam Kapoor Cannes Inspired Eye Makeup
I must say that it wasn’t an easy job and I had a tough time to pack it on the lids..dont get me started me on the fallout and the precision with which I had to pick and pat on lids.
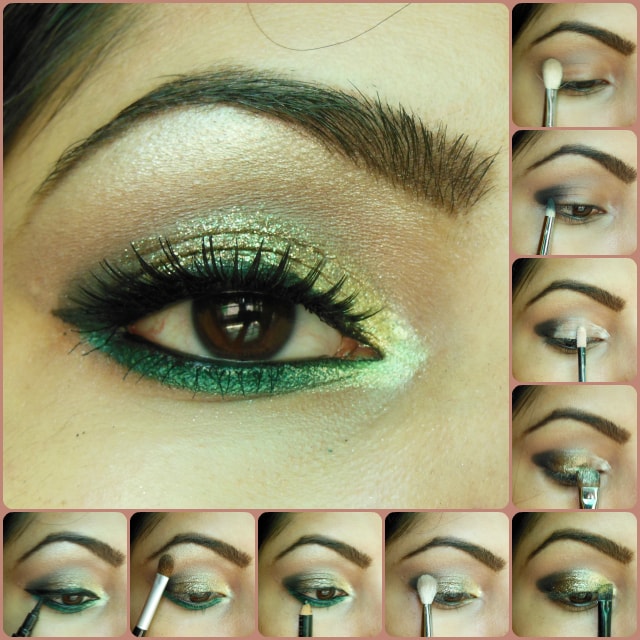
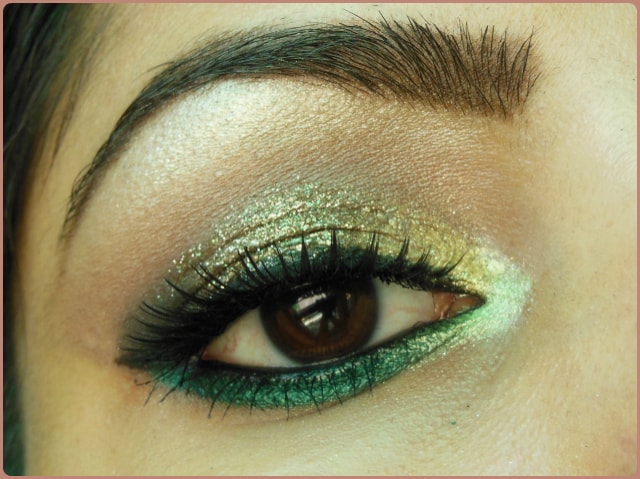
Steps to achieve this look:
Start with apply a concealer to hide dark circles and under eye pigmentation and get a smooth base for the look to be started. I also did my eye brows beforehand and hence they are not a part of this tutorial.
- Pick a matte taupe brown shade and blend it in the socket area between the lids and the brow bone using a fluffy blending brush. This will create a depth in the crease area.
- Using matte black eye shadow with a pointed pencil brush define the Outer-V corner. Apply just a bit of eye shadow and blend it lightly inwards making sure it doesn’t cover more than 1/3rd of your outer eye space.
- We are going to start with pigments, so prepare you lids with something that loose eye shadow can stick to, I have used NYX HD Eye Primer here, applied it generously over the rest of the eye area. You can easily go for some eye shadow glue or something that can make them hold better.
- With a flat shading brush , pick up the “MAC Copper Sparkle Eye Shadow pigment” and pat it gently on the center lid area. Pack the color till you achieve desired intensity
- Using angled brush apply a bright lemon yellow eye shadow on the inner eye corner. Top the extreme corner with a shimmery silverish eye shadow for a sparkling effect,
- Pick a light brown matte eye shadow and using a blending brush, blend the crease area. Keep the blending movements soft and precisely to the crease.
- Time to cover the lower lash line, for this step you can either use a dark metallic Green eye liner or apply a dark shimmery green eye shadow in patting motion with slanted liner brush and deposit the color till you achieve the desired pigmentation
- Apply a peachy highlighter to brow bone
- Apply false lashed and line the upper lash line with any of your black liner, Curl your lashes and coat them with your favorite Mascara.
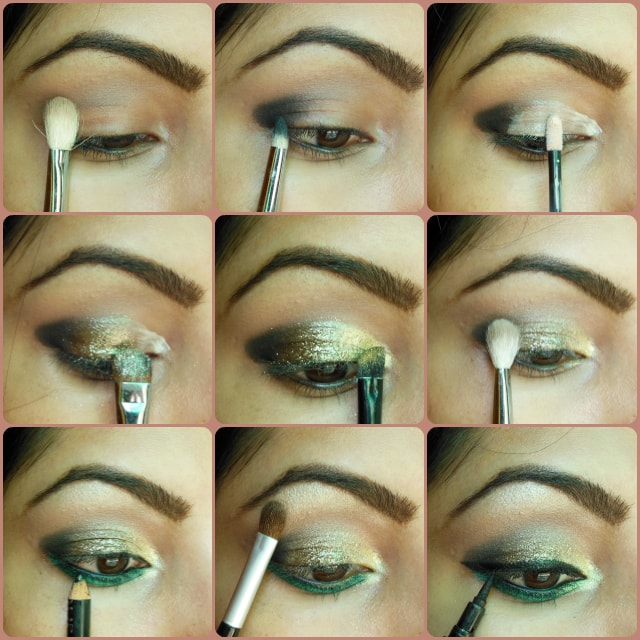
Here is a close up look at the steps.. 🙂
- Don’t Miss to Checkout: Kareena Kapoor Lakme Illusion Inspired Eye Makeup
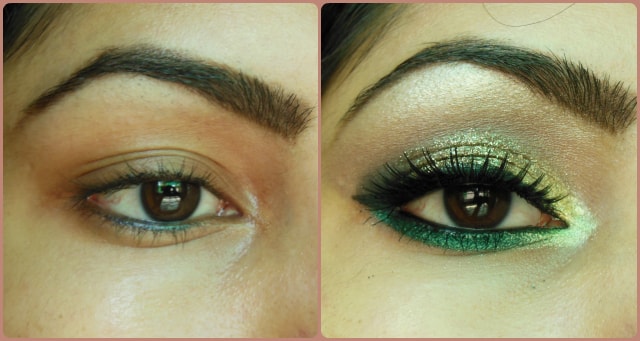
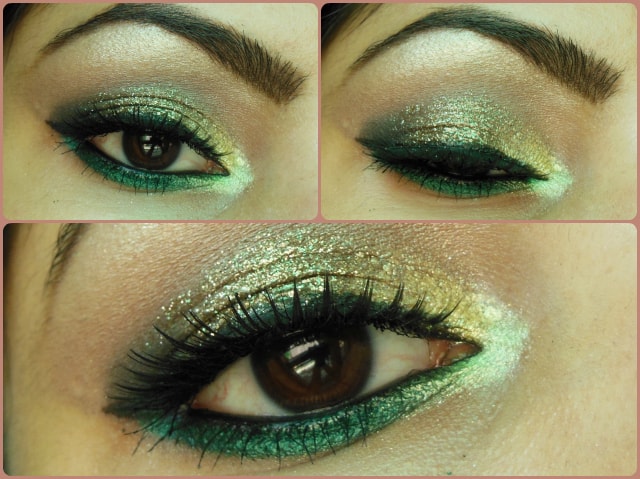
Before and After: I am not bragging but fell in love with my eyes and didn’t want to remove makeup that day.. 😛
Products Used:
- INGLOT Freedom System Eye Shadow Matte #390
- INGLOT Freedom System Eye Shadow Matte #360
- INGLOT Freedom System Eye Shadow DS #474
- Colorbar Single Eye Shadow – Gorgeous Gold
- Faces Canada Long Wear Eye Pencil – Forest Green
- MAC Loose Pigment – Copper Sparkle
- L’Oreal Paris Super Felt Tip Liner Black
- MUA Extreme Curl Mascara
Brushes Used:
- SIGMA Flat Shading Brush – E55
- SIGMA Angled Liner Brush – E65
- SIGMA Pointed Pencil Brush – E30
- SIGMA Tapered Blending Brush – E40
Hope you liked the tutorial. Share your thoughts and feedback in comments below
Loads of love.. :-* :-*
PS: If you get inspired and recreate the look, don’t forget to share it. Tag me on instagram, facebook, twitter (@Poonam_BMM). I would love to see it on your eyes.
View Comments (22)
wow superb. Love this eye make up tutorial
<3 <3 Thank you so much love!! :)
WOW that one is outstanding ! Loved the step by step tutorial as well <3
Thank you so much dear.. <3
Love your tutorials always! :)
Thanks Swati.. <3
Really beautiful!! You've too much patience
This is simply gorgeous! Love it love it love it :p
Thanks a lott sweetiee. <3 <3
Omg! this is lovely!
wooow..its such a lovely look poo :*
Glad you liked it .. <3
Beautiful. Thank you for the tutorial.I will try this today :)
Thanks Lia... That would be great.. dont forget to share your version .. would love to see.. :)
Wow.. this is sooooo beautiful ! Loved the color combinations you have used in this look !
absolutely amazing! I LOVE the green you used to line your eyes