Eye Makeup Tutorial: Dual Winged Eye Liner
Hello Everyone,
I am actually shocked to find out that I haven’t posted this look on the blog ever. I shot this tutorial like 2 years back… yes its that old and to find it in my drafts folder made me raise my brows, make a face and exclaim.. why didn’t you do it! 😛
I have been going through that playing with my liner phase and have experimented so much with my liner looks and style back then. That’s the time when I actually mastered the art of lining my eyes and since then there is no looking back. I have a feeling that I have stopped experimenting with my liner and pretty much stick to the traditional style.
But don’t worry I will come up with all sorts of crazy liner applications soon! 😀
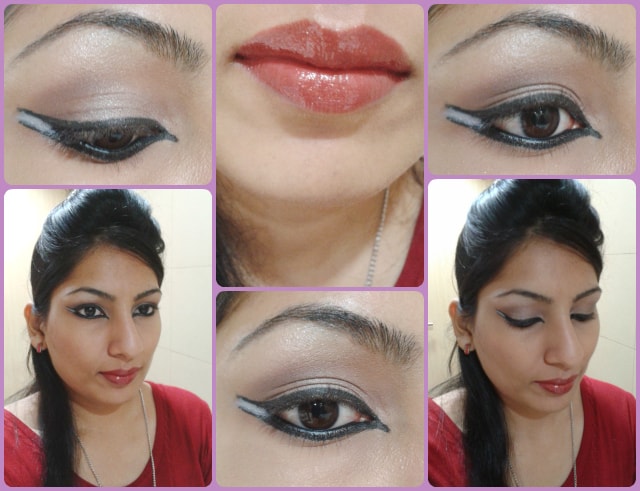
Coming back to the tutorial, this dual winged liner is the easiest way to style your eyes without too much of effort and struggling with shadows. I added a bit of definition using soft taupe shades in the crease and the lids but you can very well wear this liner alone and make a statement.
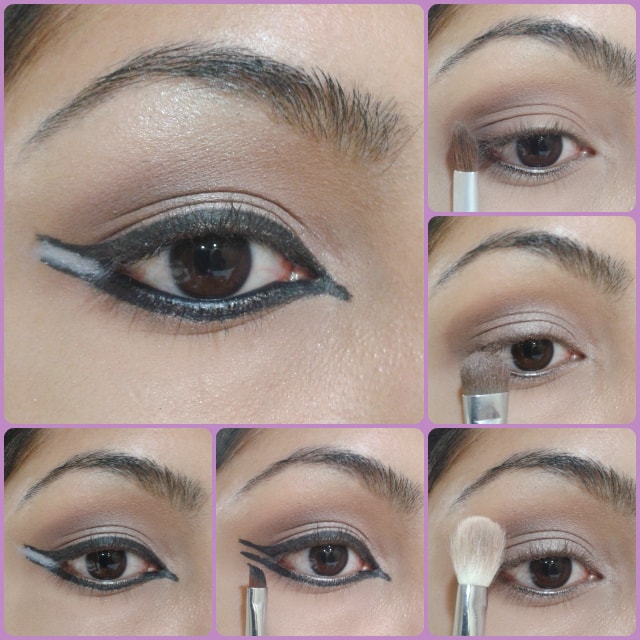
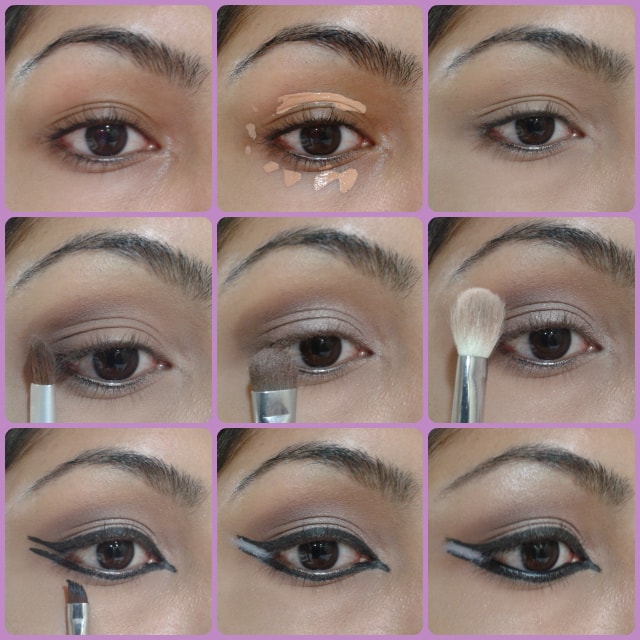
Step by Step Tutorial to Achieve this look:
- Moisturize your under eye area with a light weight eye cream
- Dot concealer over the under eye area and lids to make an even base for the eye shadow application. You can even apply any eye shadow base or primer on the lids.
- Blend it out with fingers or your favorite brush and wait for a minute for the product to settle on the eyes before applying eye shadow.
- Using a blending brush pick a Matte Taupe eye shadow and define your crease.
- Add a pearly light taupe shade over the lids using a flat shading brush and pack the color till you achieve the desired intensity.
- Take a fluffy blending brush and blend out the crease color to avoid any harsh lines
- Time to apply liner on upper lash line. I used my favorite Maybelline Gel Liner here but you can use any black liner. Extend the liner a bit to create a wing and similarly extend the liner in inner eye corner for a peacock-y eye look.
- Using the same angled liner brush, apply the same liner on lower lash line. Try to place it closest to the lashes and extend the wing parallel to the upper one.
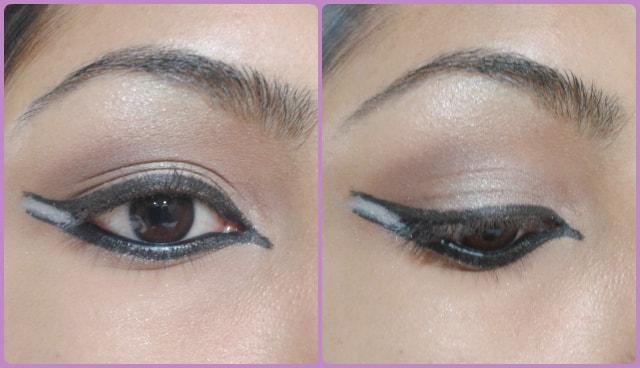
- Place your favorite color in between the winges, it could be bright poppy pink or super shimmery glitters.. I used a plain white here for a monochromatic look. Tight line your eyes with black Kohl with few coats of mascara on lashes and you are done!!
Closer look at the steps involved..
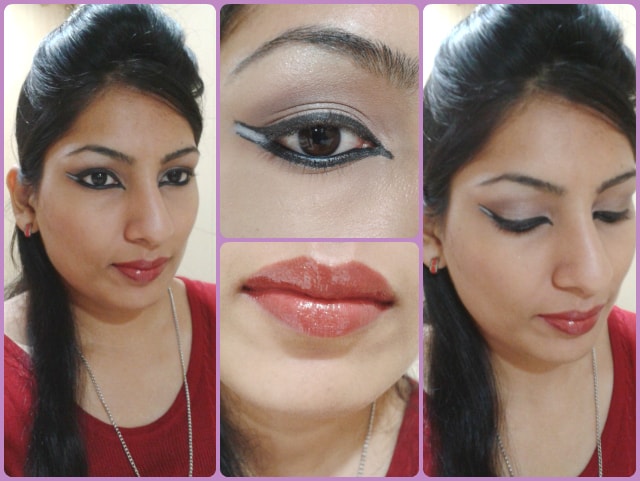
I paired it with sheer glossy Red lips and a peachy blush.
Don’t Miss to Checkout:
Hope your liked this Easy-Peasy Tutorial! Share your thoughts and feedback in comments below
Loads of love.. :-* :-*
PS: If you get inspired and recreate the look, don’t forget to share it. Tag me on instagram, facebook, twitter (@Poonam_BMM). I would love to see it on your eyes.
View Comments (3)
Lovely eye makeup Poo! The idea of placing a color between the wing ends is amazing
love love love the look completely :*
This look totally rocks! Love it! :)