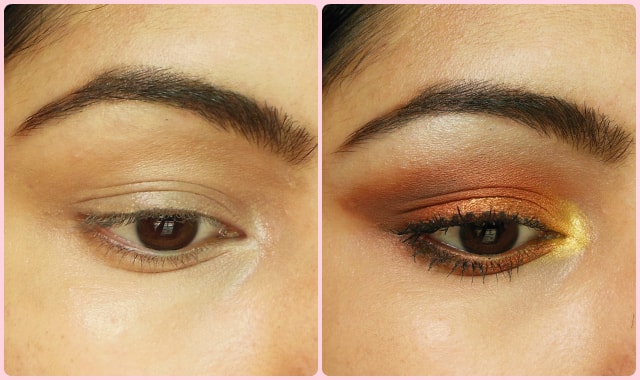
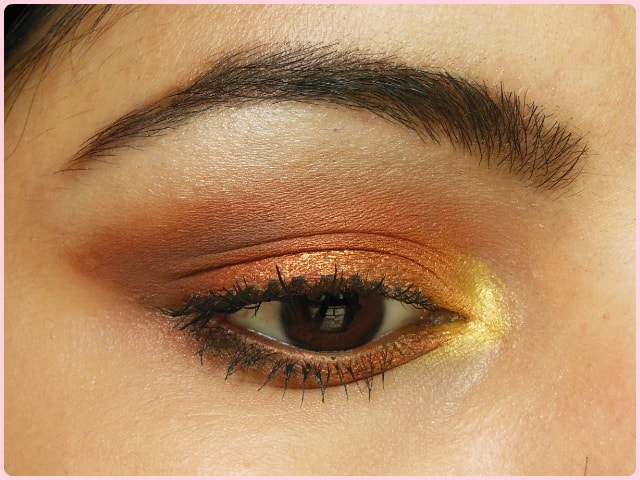
Eye Makeup Tutorial: Warm Copper Smokey Eyes
Hello Dolls,
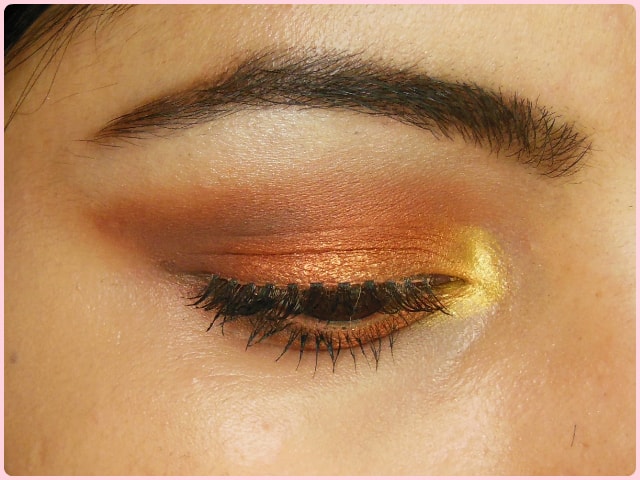
Today I will be sharing one of my favorite wearable eye makeup look which is a bright warm copper smokey eye. I will give full credit to the super gorgeous Makeup Geek Foiled Eye Shadow in Flame Thrower for inspiring me to do this look. I am still in awe of this eye shadow formula but I am even more impressed with Makeup Geek Lemon Drop, a bright metallic Lemon Yellow shade which gave such a gorgeous sheen and has a beautiful color pay off.
This eye makeup is perfect for any family function, festive celebrations or even wedding occasion and will work with any traditional or western outfits you plan to wear. You can check the full face makeup look with Warm Copper Smokey Eyes and get an inspiration on how pair this Eye Makeup Look.
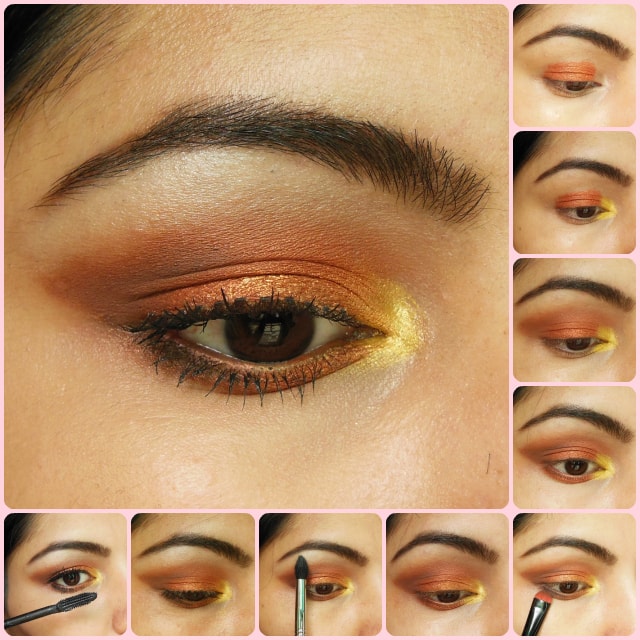
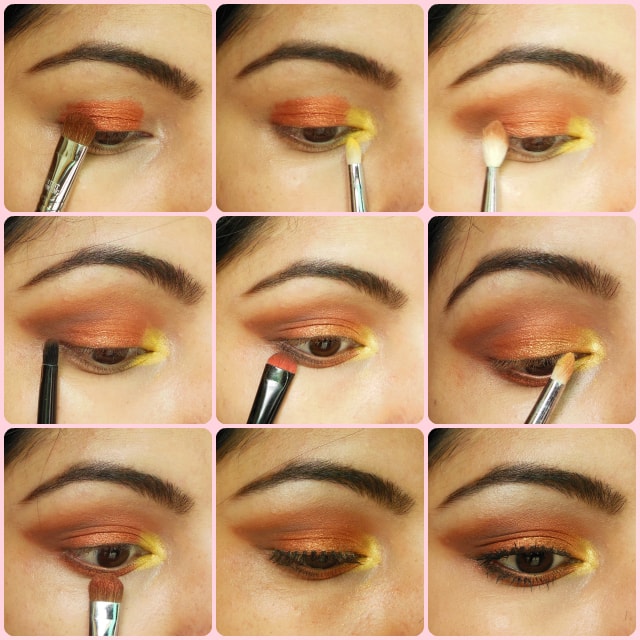
Steps to Achieve the Look:
- Pat the bright Metallic orangey Copper shade all over the lids just below the crease area. I used Makeup Geek Foiled Eye Shadow in Flame Thrower
- Instead of going to the crease area and doing all the blending I opted to go for the inner corner and applied a bright Melony yellow metallic shade and Makeup Geek Lemon Drop was perfect for this
- Conquer the blending now and pick a pale brown shade like Makeup Geek Frappe and blend the lid color to get rid of any harsh edges. Try to create a V at the outer corners for that extended winged effect because we are going to skip liner today.
- With a pointed crease brush, pack some more dark brown eye shadow like Cocoa bear in the outer-V corner and defining the winged effect at a bit more and add some intensity there.
- With a small smudger brush apply Cocoa Bear in the outer and Frappe on the inner lower lash line.
- The Yellow in the inner corner was looking a little stark so I extended it slightly towards the lids and smudged it lightly over Flame thrower for a soft transition look and ombre effect
- With the same smudging brush patted some flame Thower in the centre of lower lash line to brighten up the eyes.
- Highlight the brow bone with a soft pearl finish eye shadow for a defined brow bone look. I used Makeup Geek Shimma Shimma on a large blending brush.
- Curl lashes and coat them with your favorite Mascara and apply false lashes for more glamorous look
You can easily replace Yellow in the inner corners with a shimmery peachy gold shade for more a subtle highlight, in case you are not comfortable using yellow there.
Hope you enjoyed this tutorial!!
Share your thoughts and feedback in comments below
Loads of love.. :-* :-*
PS: If you get inspired and recreate the look, don’t forget to share it. Tag me on instagram, facebook, twitter (@Poonam_BMM). I would love to see it on your eyes.
View Comments (5)
Gorgeous Eye makeup,suitable for every outfit :)
I did not imagine copper can be combined with yellow. Lovely combination. I love copper tones.
The copper shade looks very pretty. Need to get my hands on makeup geek products.
beautiful!! where did you get the makeupgeek shadows from?
The yellow shade looks awesome with Copper,..