
Eye Makeup Tutorial: Swirly Winged Eye Liner
Hello Dolls,
I know how hard it is to fly with wings… I am talking about the Winged Eye Liner which seems like I have won a won a war if it gets perfect on both the eyes in a single shot but don’t we all get bored of the fact that we have to do it the same way every time. Well, I tell you that I get over the thing pretty soon so I keep on experimenting to keep me engaged and that’s the reason behind this Swirly Winged Eye Liner
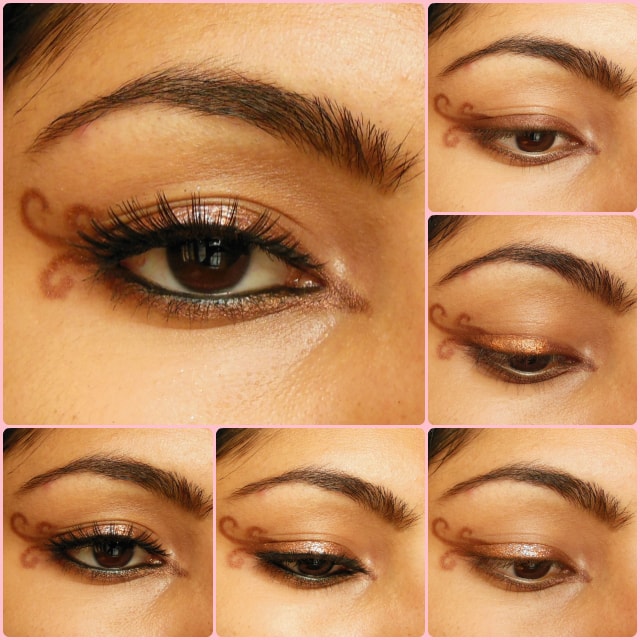
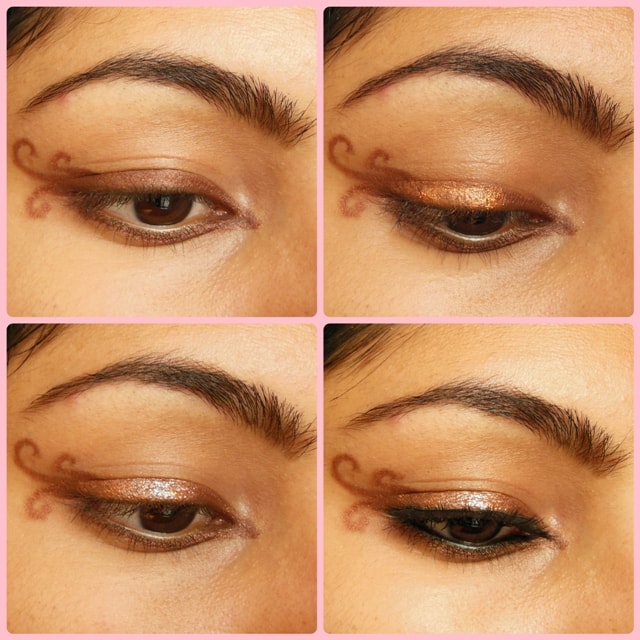
It is not an extensive tutorial because I couldn’t shoot the whole precesses of getting the curves in the liner but it majorly involves 4 steps which are described n detail below.
You can also create this look with a regular winged liner by cutting down the swirls and drawing a regular wing.
Steps to Achieve the Look:
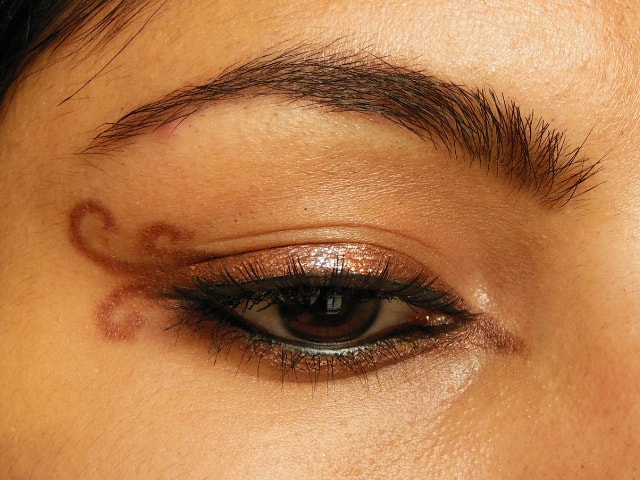
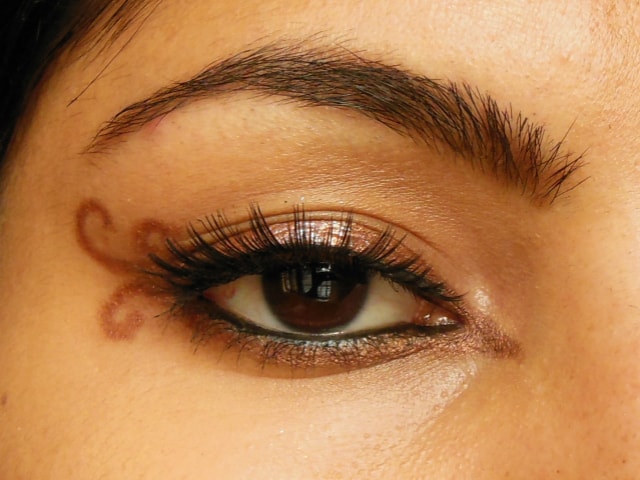
- Pick your favorite brown Gel liner preferably in metallic finish and line your upper lash and when you are about to reach the outer corner curve it inward making a small swirl. Draw 2 more of such swirls, one from upper lash line and other from Lower lash line as shown. Also, extend the liner in the inner corner to give an illusion of bigger eyes.
- Pack some bright metallic copper brown pigment< MAC Copper just on the eye liner with a small angled or smudging brush.
- To add some more reflect to eyes I added MAC Reflects Teal in the centre of the lid over the liner and boom.. the results are Bomb!!
- Finish off with a voluminous Mascara and some false lashes


Hope you enjoyed this tutorial!!
Share your thoughts and feedback in comments below
Loads of love.. :-* :-*
PS: If you get inspired and recreate the look, don’t forget to share it. Tag me on instagram, facebook, twitter (@Poonam_BMM). I would love to see it on your eyes.

wowwwwwww this one is so pretty
plz post on roposo too video tutorial……love to c u everytym….anytym
A fun and funky mix with glamour. I love it with and without the little twirls at the end. 🙂